Maddox RFB - Loadout SOKA
MODS
GUIDE
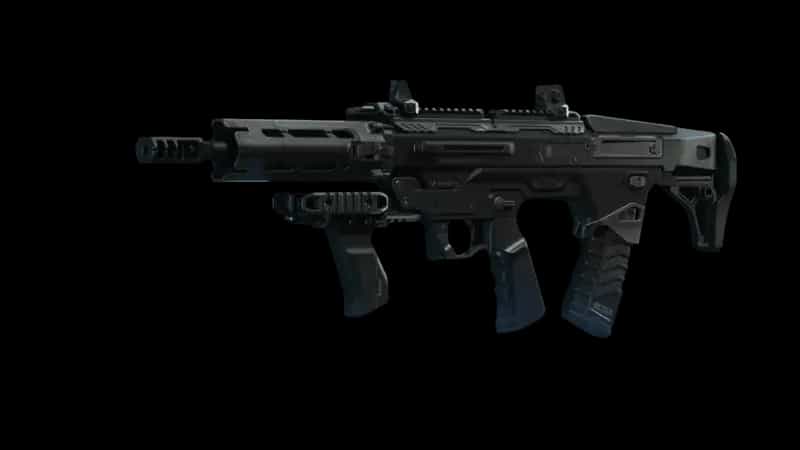
Best Maddox RFB Loadout for Warzone: A Stable, Suppressed Mid-Range Build
The Maddox RFB has the kind of profile that rewards players who prefer controlled engagements instead of simply holding the trigger and hoping recoil settles itself. In Warzone, this setup leans hard into that strength. It gives the rifle a steadier feel, keeps shots quiet with a suppressor, and improves its usefulness when enemies are moving between cover at medium range. Rather than chasing maximum mobility, the build is designed around consistency: clean sightlines, manageable recoil, and enough ballistic performance to keep pressure on opponents who think a few extra meters will make them safe.
That approach suits players who like to work from rooftops, windows, ridgelines, and the edges of squad fights where positioning matters as much as raw firepower. The Maddox RFB can still react quickly enough when a fight suddenly gets closer, especially with the uncomplicated reflex optic, but its best work comes from taking disciplined shots before the enemy reaches point-blank distance. If your Warzone style revolves around rotating early, finding advantageous angles, and punishing players crossing exposed ground, this configuration gives the rifle a very clear purpose.
Best Loadout
This Maddox RFB configuration combines suppression, barrel performance, recoil stability, visibility, and improved penetration characteristics. It is particularly well suited to players who want their primary weapon to remain dependable across the majority of normal Warzone engagement distances.
| Attachment Slot | Selected Attachment |
|---|---|
| Barrel | 19" Virtuos-OP Barrel |
| Optic | EAM xL Reflex |
| Fire Mods | 5.56 NATO FMJ |
| Muzzle | Monolithic Suppressor |
| Stock | Furrow Control Stock |
Attachment Analysis
The 19" Virtuos-OP Barrel is the foundation of the setup because it pushes the Maddox RFB toward the kind of sustained, composed gunfights where an assault rifle earns its value in Warzone. A longer performance-focused barrel generally makes more sense here than trying to turn the weapon into an oversized SMG. Combined with the Monolithic Suppressor, the rifle becomes better suited to ranged pressure while also keeping your firing less conspicuous. That matters during third-party situations, especially when you have a strong position and do not want every nearby squad immediately identifying where the shots are coming from.
Recoil behavior is further supported by the Furrow Control Stock. The objective is not to make the weapon completely motionless, but to reduce the amount of correction required after the first few rounds. That lets you spend more attention following the target rather than wrestling the reticle back onto the torso. The EAM xL Reflex fits that philosophy nicely. It avoids unnecessary magnification and leaves the sight picture open enough to track enemies strafing around head glitches, jumping from cover, or cutting sideways through a doorway.
The 5.56 NATO FMJ Fire Mod adds another practical layer to the build. Warzone fights constantly involve partial cover: thin walls, railings, vehicle edges, windows, and other surfaces that interrupt what would otherwise be a clean shot. FMJ gives the setup extra utility in those moments, allowing you to keep pressure on opponents who duck behind penetrable protection instead of immediately surrendering the angle. Taken together, these attachments produce a Maddox RFB that favors accuracy and repeatable shot placement without turning it into an excessively specialized long-range rifle.
Gameplay Tips
One situation where I’d lean heavily on this build is a squad rotating across open ground while I already have cover. I wouldn’t immediately empty the weapon at the first player I see. I’d rather settle the reflex sight, identify the opponent with the weakest route to safety, and commit to a controlled burst. The Maddox RFB benefits from staying composed, and the Furrow Control Stock makes follow-up corrections far easier when someone starts sprinting diagonally or slide-canceling toward cover.
The suppressor also changes how aggressively I’d use a strong rooftop or upper-floor window. If an enemy team has not located me yet, there is no reason to advertise the position by repeatedly peeking from the exact same spot. Fire, move a few meters, change the angle, and make them search for you again. The build has enough stability to exploit those small positional adjustments without requiring a huge amount of settling time every time you re-engage.
Inside buildings, I’d become much less stubborn. If an SMG player suddenly appears three meters away, trying to prove that the Maddox can win every possible duel is usually the wrong decision. I’d break line of sight if possible, move through another doorway or around a staircase, and force the next exchange to happen with a little more space. Pairing this rifle with a fast close-range secondary makes far more sense than forcing it into fights where hip-fire speed and extreme mobility decide everything.
The FMJ rounds are particularly useful when an opponent ducks behind cover after being cracked. That does not mean I’d blindly dump ammunition through every wall. I’d use it when I have a good read on where the player stopped—behind a thin interior wall, a wooden structure, or a penetrable obstacle near a window. A couple of deliberate follow-up shots can prevent an easy armor reset, and even when they do not secure the elimination, they can keep the enemy pinned while a teammate changes angle.
In Resurgence, I’d play the rifle slightly more aggressively because engagements recycle quickly and enemies tend to reappear around familiar buildings and rooftops. Pre-aiming a staircase after hearing footsteps, holding the exit from a redeploy route, or watching the roof that an enemy squad keeps reclaiming can generate easy damage. In Battle Royale, I prefer a more conservative rhythm. A bad overextension matters much more there, so I’d use the Maddox to control space during rotations rather than chase every cracked player across open terrain.
One habit I would avoid is continuing to shoot simply because the first few bullets connected. If the target reaches solid cover and the angle is gone, reposition. The Maddox RFB feels much better when you create another clean engagement than when you burn ammunition waiting for somebody to repeek the exact same corner.
Conclusion
This Maddox RFB Warzone loadout turns the rifle into a composed, versatile primary built for players who value positioning and repeatable accuracy. The combination of the 19" Virtuos-OP Barrel, Monolithic Suppressor, and Furrow Control Stock gives the weapon a stable foundation, while the EAM xL Reflex keeps target acquisition comfortable and 5.56 NATO FMJ adds useful pressure against enemies relying on light cover.
It is not a build designed to sprint through every doorway or dominate point-blank fights. Its advantage comes from making sensible engagements easier to execute: catch rotations, hold useful angles, punish exposed movement, and relocate before opponents can turn the fight around. Give the Maddox RFB some room to work, and this setup becomes a reliable option for players who prefer winning fights through control rather than chaos.
PERKS & EQUIPMENT
- Drill Instructor
- Sprinter
- Tempered
Equipment
- LethalSemtex
- TacticalConcussion Grenade