X9 Maverick - Loadout MrMarvelTV
MODS
GUIDE
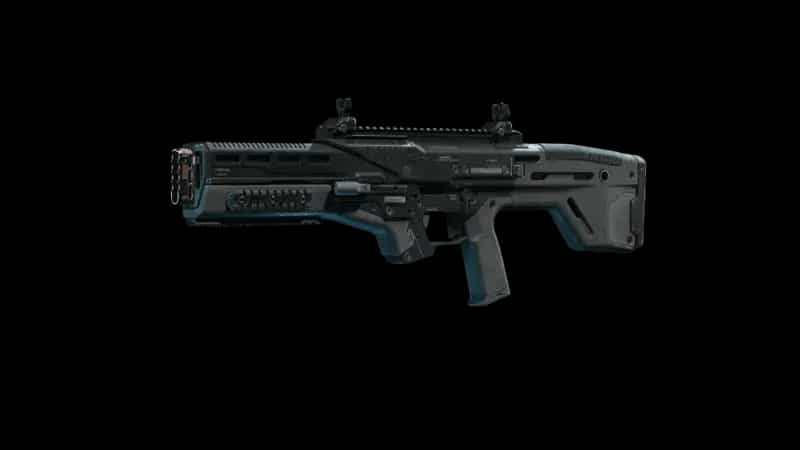
Best X9 Maverick Loadout for Warzone: A Suppressed Mid-Range Build
The X9 Maverick is the kind of Warzone weapon that rewards controlled aggression rather than reckless pushing. With the right setup, it can cover the awkward space between close-quarters weapons and heavier long-range options, giving you enough speed to react quickly while still feeling composed when a target appears across a street, rooftop, or open rotation. This particular configuration leans into that versatility. Instead of building the Maverick purely for movement or turning it into a slow recoil-focused platform, the attachments create a balanced weapon that is comfortable during sustained engagements and still responsive enough for faster fights.
What stands out about this version is its emphasis on suppressed fire, cleaner sightlines, stronger projectile performance, and controllable handling. That combination fits players who like taking fights from advantageous positions, moving between cover, and applying pressure without immediately advertising their location to everyone nearby. It is not a dedicated room-clearing build, and I would not treat it like an SMG. Give it a little space, though, and the X9 Maverick becomes a much more convincing primary.
Best Loadout
The goal here is to give the X9 Maverick a stable, practical setup for the ranges that appear constantly in Warzone, particularly when fights stretch beyond immediate point-blank distance.
| Attachment Slot | Selected Attachment |
|---|---|
| Muzzle | Monolithic Suppressor |
| Optic | Fang HoverPoint ELO |
| Barrel | 16" OS-Density Barrel |
| Fire Mods | 4.73 Caseless Overpressured |
| Rear Grip | Pillory Grip |
Attachment Analysis
The Monolithic Suppressor sets the tone for the entire build. Staying suppressed is extremely valuable when you are trying to finish one opponent without immediately attracting another squad, especially around dense areas where several teams may be fighting within a few buildings of each other. It also complements the longer, more deliberate approach encouraged by the rest of the setup rather than forcing the Maverick into frantic close-range engagements.
Pairing it with the 16" OS-Density Barrel gives the weapon a stronger foundation for those mid-range fights. The barrel helps shape the Maverick into something that feels more dependable once the target is no longer directly in front of you. Add 4.73 Caseless Overpressured ammunition to the equation and the build becomes better suited to tracking enemies across streets, open terrain, and longer interior sightlines where projectile performance matters more than raw movement speed.
The Fang HoverPoint ELO is an important part of the setup because the Maverick benefits from an uncluttered aiming picture. When someone is sliding between cover or crossing diagonally across your field of view, a simple optic makes maintaining visual contact noticeably easier than relying on a busier sight picture. It also helps during those brief moments when only a head and shoulders are visible over a wall or rooftop edge.
Finally, the Pillory Grip keeps the weapon from becoming too cumbersome after adding attachments geared toward ranged effectiveness. The complete setup still asks for controlled bursts of movement and sensible positioning, but it does not feel designed exclusively for players sitting on one angle. You can rotate, re-challenge, reposition to another window, and keep the Maverick involved without turning every engagement into a stationary gunfight.
Gameplay Tips
One situation where I would immediately feel comfortable with this setup is defending a rooftop while another squad rotates across the road below. I would not spray simply because I see movement. I would let the target clear whatever cover is nearby, settle the Fang HoverPoint ELO on their path, and then commit once they have fewer places to disappear. The Maverick makes more sense when you give yourself enough time to track properly rather than forcing hurried shots at every silhouette.
Inside buildings, I would be more selective. If an enemy suddenly appears five meters away with a fast SMG, that is not the duel I want to build my match around. Pre-aiming a staircase or doorway changes the situation completely, because the X9 Maverick can capitalize when your crosshair is already near the target. But if I hear someone sprinting directly toward my room, I would rather reposition behind another piece of cover or switch to a dedicated close-range secondary than pretend this setup has no weaknesses.
The suppressed nature of the build also changes how aggressively I would chase damaged players. Cracking someone at medium range does not automatically mean sprinting after them. If their squad is nearby, I prefer shifting sideways to another angle and forcing the damaged player to guess where the next burst is coming from. The Monolithic Suppressor supports that style nicely; you can keep applying pressure without making your exact firing position quite as obvious to every third party in the area.
Resurgence encourages faster decisions, so there I would play the Maverick a little closer to the action. Holding the next room, balcony, or rooftop instead of following teammates directly through the same doorway gives the weapon the separation it wants. When opponents keep flooding back into a hot area, the clean optic and controlled feel are useful for catching players landing on roofs or sprinting between neighboring buildings.
Battle Royale gives me more reason to lean into the opposite side of the build. During late rotations, I would rather move early, reach hard cover, and make enemies cross into my sightline. Trying to beam someone from an absurd distance just because they are visible wastes ammunition and can expose your position for very little reward. The X9 Maverick is far more convincing when the target is distant enough to require good tracking but still close enough that your shots translate into immediate pressure.
One habit I would keep with this weapon is leaving myself an escape route before shooting. A wall, stairwell, vehicle, ridge, or second rooftop angle matters. If the first burst does not secure the advantage, I want somewhere to move rather than standing in the same window waiting for return fire. With this Maverick build, the better decision is often not firing sooner; it is choosing the position that lets you fire twice.
Conclusion
This X9 Maverick Warzone loadout gives the weapon a clear identity without pushing it too far toward a single extreme. The Monolithic Suppressor keeps engagements discreet, the OS-Density Barrel and Overpressured ammunition strengthen its performance when fights open up, while the Fang HoverPoint ELO and Pillory Grip keep the weapon practical during constant movement and target tracking.
It is a setup for players who prefer creating favorable gunfights instead of relying entirely on reaction speed. Use cover, choose sensible distances, and resist the temptation to chase every cracked opponent into a tiny room. When the Maverick is allowed to work from a few steps outside the chaos, this build has plenty to offer.
PERKS & EQUIPMENT
- Mountaineer
- Sprinter
- Adaptive
Equipment
- LethalSemtex
- TacticalStim Shot