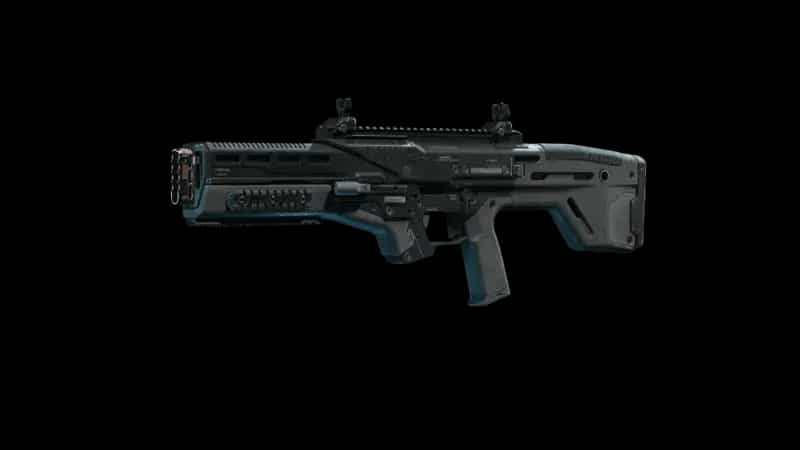
X9 Maverick - Loadout No Recoil by Expel
MODS
GUIDE
Best X9 Maverick Loadout for Warzone: A Suppressed Mid-Range Build
The X9 Maverick is the kind of Warzone weapon that makes the most sense when you build around consistency rather than trying to force it into an extreme role. With the right attachment package, it can become a dependable primary for players who prefer controlled engagements, clean sightlines, and the freedom to pressure enemies without constantly fighting the gun itself. This setup leans heavily into that philosophy, combining recoil management, a practical optic, suppressed fire, and ammunition designed to remain useful when opponents start hiding behind light cover.
What stands out about this version of the X9 Maverick is how comfortably it fits into a traditional Battle Royale loadout. It is not designed as a hyper-mobile weapon for bursting through doorways, nor does it try to imitate a dedicated sniper alternative. Instead, it sits in the valuable space between those roles. If your game revolves around controlling rooftops, catching enemies during rotations, supporting teammates from a second angle, or applying sustained pressure across medium-to-long sightlines, this configuration gives the Maverick a much clearer identity.
Best Loadout
This build prioritizes a predictable firing pattern and effective ranged pressure while keeping the weapon suppressed. The combination is particularly useful when you need to stay accurate through longer bursts instead of depending on a handful of perfectly timed shots.
| Attachment Slot | Selected Attachment |
|---|---|
| Barrel | 16" OS-Density Barrel |
| Optic | Fang HoverPoint ELO |
| Fire Mods | 4.73 Caseless FMJ |
| Muzzle | Monolithic Suppressor |
| Underbarrel | VAS Convergence Foregrip |
Attachment Analysis
The 16" OS-Density Barrel gives the build its ranged foundation. A longer barrel is exactly what I want on a Maverick setup intended to compete beyond immediate close quarters, because the weapon needs enough ballistic consistency to make sustained fire worthwhile. Pairing that with the Monolithic Suppressor reinforces the same approach while adding the tactical benefit of suppressed shots. In Warzone, remaining less obvious while firing can matter almost as much as raw weapon statistics, particularly when several squads are rotating through the same area.
Recoil behavior is addressed by the VAS Convergence Foregrip, which is an important part of what makes this combination practical rather than merely powerful on paper. A weapon can have excellent theoretical damage at range, but that means very little if each correction drags the reticle away from a moving target. With extra stabilization underneath the rifle, the Maverick is better suited to maintaining pressure during those longer bursts that often decide fights against enemies crossing streets, hillsides, or open sections of a rooftop.
The Fang HoverPoint ELO keeps the sight picture simple. That choice fits the build because there is little benefit in loading the Maverick with excessive magnification when most of its best fights are likely to happen in that medium-distance window. A clean optic makes target acquisition quicker, gives you enough visibility to track strafing enemies, and avoids making the weapon feel cumbersome when a fight suddenly collapses into a shorter lane.
Finally, 4.73 Caseless FMJ adds another layer of utility. Rather than building purely around speed, this loadout gives you ammunition that is better suited to maintaining pressure when an opponent ducks behind penetrable cover. That can be valuable around walls, vehicles, railings, and the thinner structures that frequently interrupt otherwise straightforward gunfights. Taken together, the five attachments produce a Maverick that values stability, discretion, and practical versatility over aggressive handling.
Gameplay Tips
One situation where I would immediately trust this setup is when another squad is forced to rotate across exposed ground. I would not waste ammunition spraying from the moment I see movement. I would get the reticle settled first, wait until the target has fewer escape options, then commit to a controlled burst. The Maverick benefits more from staying composed than from trying to overwhelm someone with chaotic fire.
The suppressor also changes how aggressively I would use secondary angles. Imagine your squad is fighting from the front of a building while you have access to a side window or nearby rooftop. I would rather move five or ten metres off the obvious firing position and start shooting from there. Even if the first target survives, the suppressed shots make it less straightforward for the rest of the enemy squad to immediately identify where the additional pressure is coming from.
Indoors is where I would become much less stubborn. If an SMG player suddenly appears three metres away while sprinting through a doorway, I would not pretend this carefully stabilized setup is built to win every reaction fight. Keeping a fast secondary weapon alongside the X9 Maverick makes much more sense. The Maverick can hold the staircase, watch the next building, or punish someone peeking from a window; let the secondary handle the frantic room-clearing work.
There is also a useful little FMJ habit here. When I crack an opponent and see them disappear behind a thin piece of cover, I would often send a few extra rounds through the surface instead of immediately sprinting after them. Chasing a cracked enemy is one of the easiest ways to walk into their teammate's crosshair. With this build, continuing the pressure from a safe position can be the smarter choice.
In Resurgence, I would play the Maverick a little faster simply because enemies return quickly and fights develop closer together. Pre-aiming common rooftop exits and holding lanes between adjacent buildings can generate more value than roaming blindly for kills. In Battle Royale, meanwhile, I would protect ammunition and choose fights more selectively. There is no reason to reveal your position by shooting at somebody 150 metres away if the odds of securing the elimination are poor.
What I like most is that this build rewards small positioning decisions. Moving behind a chimney before re-peeking, changing windows after firing, or waiting two seconds for an enemy to leave cover can matter more than squeezing every possible shot out of the magazine. The Maverick feels far more convincing when you make the fight come to its strengths rather than chasing somebody into theirs.
Conclusion
The X9 Maverick loadout built around the 16" OS-Density Barrel, Monolithic Suppressor, VAS Convergence Foregrip, Fang HoverPoint ELO, and 4.73 Caseless FMJ offers a focused answer for Warzone players who want a composed, ranged primary. Its strongest qualities are control, unobtrusive firing, a clear sight picture, and the ability to keep pressure on opponents even when they begin using cover.
It is a build for deliberate gunfights rather than reckless pushes. Give the Maverick a stable firing position, pick sensible angles, and resist the temptation to turn every cracked plate into an immediate chase. Used that way, this setup can become a remarkably dependable weapon to carry through both structured Battle Royale rotations and the faster chaos of Resurgence.
PERKS & EQUIPMENT
- Mountaineer
- Sprinter
- Adaptive
Equipment
- LethalSemtex
- TacticalStim Shot