X9 Maverick - Loadout WhosImmortal
MODS
GUIDE
Best X9 Maverick Loadout for Warzone: A Stable, Suppressed Mid-Range Build
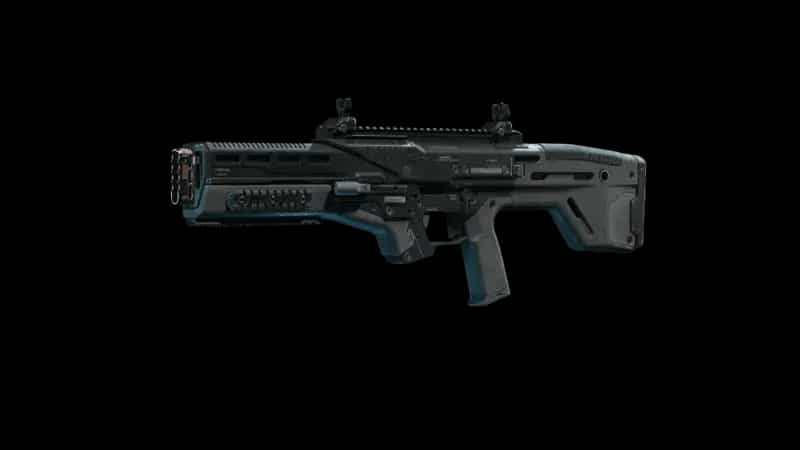
The X9 Maverick becomes a much more convincing Warzone primary when it is built around consistency rather than trying to squeeze maximum aggression out of the weapon. This setup favors controlled engagements, clean tracking and enough stability to stay on target when an opponent refuses to stand still. With the 19.5" Shroud Barrel, Monolithic Suppressor and two attachments dedicated to handling the gun more confidently, the Maverick feels tailored for players who prefer winning fights through positioning and accurate sustained fire. It is particularly attractive as a Battle Royale rifle, where being able to challenge enemies across streets, rooftops and open rotations can matter more than shaving every possible millisecond from close-range handling.
Best Loadout
This version of the X9 Maverick is designed as a dependable all-purpose primary with a clear emphasis on ranged control. Rather than using an extended magazine or an attachment purely for aggressive mobility, the build invests heavily in keeping the weapon predictable while aiming.
| Attachment Slot | Selected Attachment |
|---|---|
| Barrel | 19.5" Shroud Barrel |
| Underbarrel | EAM Steady-90 Grip |
| Optic | Lethal Tools ELO |
| Muzzle | Monolithic Suppressor |
| Stock | Strider Overstep Stock |
Attachment Analysis
The backbone of the setup is the combination of the 19.5" Shroud Barrel and Monolithic Suppressor. It gives the Maverick a distinctly ranged character, making the weapon better suited to deliberate gunfights where keeping shots grouped is more valuable than snapping instantly between targets at point-blank distance. The suppressor also fits Warzone particularly well because staying less obvious on the battlefield gives you more freedom when firing from rooftops, windows or rotation positions. Paired with the longer barrel, the result is a rifle that feels built around committing to medium-distance engagements instead of constantly forcing close-quarter fights.
Control is reinforced by the EAM Steady-90 Grip, while the Strider Overstep Stock complements the rest of the configuration by helping the Maverick feel less awkward when adjusting position during an engagement. That balance matters because a range-focused weapon can easily become too static. Here, the goal is not to turn the X9 Maverick into a laser that only works while planted behind cover; it is to give the player enough composure to track a target while still being able to strafe, correct an angle or move between pieces of cover.
The Lethal Tools ELO is the final piece that makes the setup practical. A clean sight picture is valuable on a weapon intended for repeated medium-range challenges, especially when enemies are crossing uneven terrain or appearing between objects in cluttered urban areas. It also avoids pushing the rifle too far toward a dedicated long-range configuration. You still have a sight that works naturally when somebody appears closer than expected, which is important because the X9 Maverick is supposed to remain versatile rather than becoming a substitute sniper rifle.
There is one meaningful trade-off: this build does not dedicate an attachment slot to additional ammunition. That makes accuracy and reload timing more important than they would be on a large-magazine configuration. The upside is that every selected attachment contributes to the way the Maverick actually behaves during a gunfight. Instead of carrying extra rounds to compensate for missed shots, the setup encourages cleaner bursts, controlled tracking and smarter decisions about when to remain exposed.
Gameplay Tips
One situation where I would immediately trust this Maverick is holding an enemy rotation from a good piece of cover. Imagine a squad leaving a building and crossing toward the next zone: I would rather start firing once I have a clear angle on one player than spray at the first glimpse of movement. The build rewards those extra fractions of a second spent settling the sight. Once the target is committed to the crossing, the stable sight picture makes following lateral movement much easier.
I would be much more cautious chasing a cracked opponent through a doorway. The temptation is obvious—you have already removed most of their armor, so finishing the kill feels automatic—but this setup has spent several attachment slots improving its ranged behavior rather than turning the Maverick into a dedicated room-clearing weapon. If I know an SMG player is waiting around the corner, I would rather plate, change the entry angle or let a faster secondary handle the push. Throwing away a strong positional advantage just because the opponent is weak is exactly how a good mid-range build gets dragged into the wrong fight.
Rooftops are especially comfortable territory. From an elevated angle, I would use the Maverick to punish players moving between buildings and then reposition after several bursts instead of repeatedly peeking the same head-glitch. Suppression helps here because every shot does not need to advertise your position as aggressively to nearby squads. Against someone rapidly changing direction, I would also avoid overcorrecting the aim. Let the stability of the build do some of the work and make small tracking adjustments rather than wrestling the reticle from side to side.
The missing extended magazine changes how I would handle squad pressure. After downing or badly damaging one enemy, I would not automatically keep spraying into the second target if the magazine is already running low. Breaking line of sight for a reload is often more valuable than squeezing out the final few rounds and getting caught empty-handed. That matters even more in Resurgence, where another opponent can arrive almost immediately after the first engagement.
Battle Royale gives this setup more room to breathe. Long rotations, ridgelines and fights between neighboring structures naturally create the distances the Maverick wants. Resurgence is faster and less forgiving, so I would play closer to cover and avoid being the first player through every doorway. One habit I would keep in both modes is simple: after firing from an exposed position, move a few meters before challenging again. A controlled rifle is useful; a controlled rifle firing from an angle the enemy has already pre-aimed is much less impressive.
Conclusion
This X9 Maverick Warzone loadout takes a disciplined approach to the weapon. The 19.5" Shroud Barrel and Monolithic Suppressor establish the ranged foundation, while the EAM Steady-90 Grip, Strider Overstep Stock and Lethal Tools ELO make that foundation easier to use in real engagements rather than only on stationary targets.
It is a particularly appealing configuration for players who value accurate tracking, quieter engagements and intelligent positioning over maximum close-range aggression. Give the Maverick space to work, resist unnecessary indoor chases, and the build can become a reliable primary for controlling the messy medium-distance fights that decide so many Warzone matches.
PERKS & EQUIPMENT
- Scavenger
- Sprinter
- Tempered
Equipment
- LethalSemtex
- TacticalStim Shot