X9 Maverick - New Loadout WhosImmortal
MODS
GUIDE
Best X9 Maverick Loadout for Warzone – A Stable Suppressed Build for Mid-Range Fights
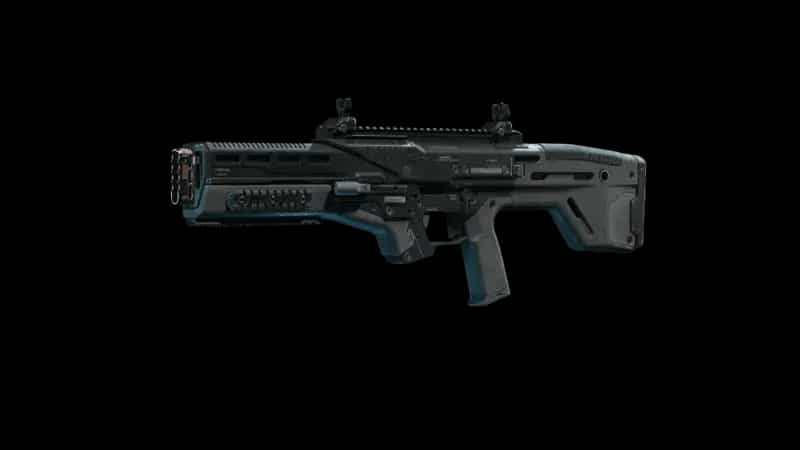
The X9 Maverick becomes a much more convincing Warzone option when it is built around control rather than raw aggression. Its real value comes from being able to settle into sustained mid-range gunfights, track targets cleanly, and keep pressure on enemies without turning every burst into a recoil correction exercise. This setup pushes the weapon firmly in that direction, combining extra barrel performance, suppression, a clean sight picture, additional stability, and a stock designed to make the rifle easier to manage once the shooting starts.
I’d look at this version of the X9 Maverick primarily as a dependable primary for players who prefer calculated positioning over constant close-range chasing. It fits naturally into Battle Royale rotations, rooftop holds, ridge fights, and the kind of engagements where you spot an opponent crossing between pieces of cover and need several accurate shots before they disappear. The build gives up some of the snappiness you would expect from a lighter configuration, but the trade is a rifle that feels far more composed when the distance begins to stretch.
Best Loadout
This X9 Maverick configuration focuses on keeping the weapon predictable while maintaining enough practical handling to react during changing Warzone fights. The five attachments lean heavily toward consistency, especially when firing longer bursts at enemies who are strafing or trying to escape across open ground.
| Attachment Slot | Selected Attachment |
|---|---|
| Barrel | 19.5" Shroud Barrel |
| Muzzle | Monolithic Suppressor |
| Optic | Lethal Tools ELO |
| Underbarrel | EAM Steady-90 Grip |
| Stock | Strider Overstep Stock |
Attachment Analysis
The backbone of the build is the combination of the 19.5" Shroud Barrel and Monolithic Suppressor. On a Warzone primary, that pairing makes sense because the rifle needs to remain useful beyond the first few meters of an engagement. The longer barrel gives the Maverick a more deliberate long-gun character, while the suppressor supports a less exposed style of fighting. Instead of building around instant ADS speed and frantic room clearing, the setup is designed to keep shots effective and manageable when an opponent is moving between cover at medium or extended distances.
That philosophy continues with the EAM Steady-90 Grip and Strider Overstep Stock. Both attachments reinforce the idea that this Maverick should stay calm during sustained fire. Recoil control and aiming stability matter considerably more once an enemy starts changing direction, sliding behind a vehicle, or strafing from the edge of a rooftop. The easier the weapon is to keep centered, the less time you spend dragging the reticle back onto the target after the opening shots. In squad fights, that consistency is particularly valuable because you may need to transition immediately from one opponent to another without completely resetting your aim.
The Lethal Tools ELO finishes the setup with a clean, uncomplicated sight picture. That matters more than it sounds. A controlled rifle can still feel awkward if the optic obscures too much of the fight or makes tracking harder when somebody cuts laterally across your screen. With this configuration, the optic suits the weapon’s intended engagement window without adding unnecessary visual clutter. Taken together, the attachments create a Maverick that prioritizes repeatable accuracy, steadier follow-up fire, and versatility rather than trying to turn the gun into something unnaturally fast.
Gameplay Tips
One situation where I’d want this Maverick is during a rotation when another squad is moving parallel to mine. If an enemy has to cross a road, a courtyard, or the gap between two buildings, I’d rather establish the sight picture early and start firing from a stable position than sprint forward looking for a closer duel. The build rewards that half-second of preparation. Pre-aim the likely exit from cover, let the opponent move into the reticle, and make them deal with sustained pressure while they are exposed.
I wouldn’t become too comfortable just because the gun feels controlled, though. A player bursting through a doorway with a dedicated SMG can force the Maverick into exactly the kind of fight this setup is not trying to win. If I hear footsteps below a rooftop or behind a nearby wall, I’m already thinking about distance: back away from the doorway, use the stairs or railing to create separation, or switch to a faster secondary before committing. Chasing a cracked enemy into a cramped room is especially tempting, but this is one of those builds where the smarter decision can be to hold the exit and make them come back into your preferred sightline.
Moving targets are where the extra stability earns its place. When someone starts zig-zagging across open terrain, I’d avoid overcorrecting every change of direction. Keep the reticle moving smoothly through the target and let the weapon’s controlled behavior do part of the work. Against a squad trying to rotate under pressure, that can be enough to turn one armor break into a down and then force the remaining players to abandon their route.
Resurgence changes the pace considerably. There, I’d use the Maverick more as an anchor weapon while teammates take the aggressive angles. Holding a window, watching a neighboring rooftop, or covering the street while a teammate pushes gives the rifle room to operate. What I would avoid is being the first player through every door. You can absolutely move with the squad, but I’d rather arrive a few meters behind the entry player and punish whoever swings out to challenge them.
There is also a small habit worth developing with this build: reposition after sustained fire. Suppression helps, but Warzone teams are constantly reading tracers, audio cues, and angles. If I have already fired repeatedly from one rooftop corner, I’m not peeking the exact same spot for the fourth time unless I have no alternative. Shift a few meters, change elevation, or use another piece of cover. A stable rifle becomes much harder to deal with when the enemy cannot pre-aim the place where it is going to appear next.
Conclusion
The X9 Maverick built with the 19.5" Shroud Barrel, Monolithic Suppressor, Lethal Tools ELO, EAM Steady-90 Grip, and Strider Overstep Stock is a strong choice for Warzone players who value controlled gunfights and reliable target tracking. It is not constructed to overwhelm opponents through pure mobility; its advantage comes from giving you a steadier platform when positioning and shot placement matter more than frantic movement.
Use it from sensible angles, avoid unnecessary point-blank challenges, and the Maverick becomes the kind of primary that can quietly control a large portion of a fight. If your Warzone style revolves around reading rotations, covering teammates, and catching enemies while they move between pieces of cover, this configuration is well worth building around.
PERKS & EQUIPMENT
- Scavenger
- Sprinter
- Tempered
Equipment
- LethalCombat Axe
- TacticalStim Shot