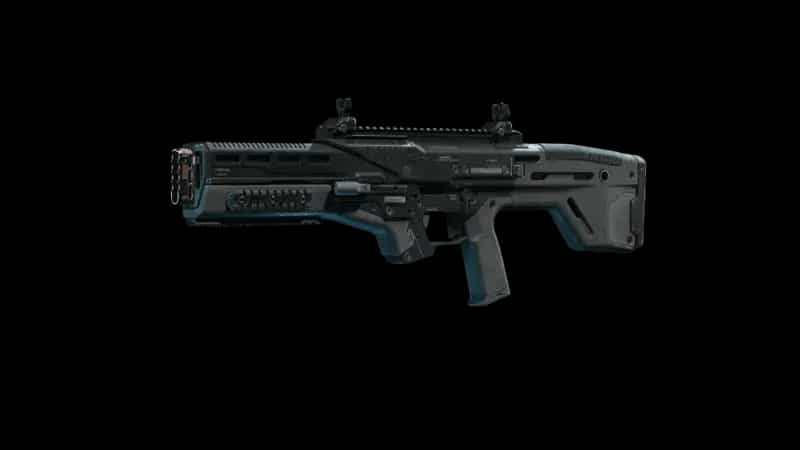
X9 Maverick "X Ray" - Loadout by Legends6K
MODS
GUIDE
Best X9 Maverick Loadout for Warzone: A Versatile Mid-to-Long Range Build
The X9 Maverick is at its best when you give it room to work. Rather than forcing it into an ultra-aggressive setup, this Warzone build leans into controlled engagements, cleaner sightlines, and the ability to pressure opponents before they can comfortably close the distance. Its combination of respectable handling and sustained accuracy makes it a strong option for players who prefer choosing their fights instead of constantly diving into buildings.
What makes this particular configuration interesting is its flexibility. The EAM Dual Zoom gives you the freedom to adjust your sight picture depending on the engagement, while the barrel, suppressor, foregrip, and stock are built around keeping the weapon composed when firing repeatedly. I would treat the X9 Maverick as a primary for rotations, rooftop battles, and medium-to-long-range squad fights, pairing it with something faster for those moments when an enemy suddenly appears five metres away.
Best Loadout
This X9 Maverick setup focuses on keeping shots manageable across typical Warzone fighting distances without turning the weapon into an overly slow, cumbersome platform.
| Attachment Slot | Selected Attachment |
|---|---|
| Optic | EAM Dual Zoom |
| Barrel | 16" OS-Density Barrel |
| Muzzle | Monolithic Suppressor |
| Underbarrel | Quickstep Foregrip |
| Stock | Specter-X Guard Stock |
Attachment Analysis
The foundation of the build is the 16" OS-Density Barrel working alongside the Monolithic Suppressor. Together, they push the Maverick toward the kind of disciplined ranged role that suits Warzone particularly well. The barrel gives the setup a more deliberate feel when tracking opponents across open terrain, while the suppressor complements that style by keeping your presence less obvious during extended exchanges. That matters when you're shooting from a rooftop or hillside and don't want every nearby squad immediately identifying where the pressure is coming from.
The EAM Dual Zoom is a particularly useful choice because Warzone rarely gives you perfectly consistent engagement distances. One moment you're following an opponent moving between buildings; seconds later you're trying to land shots on somebody crossing a distant road. Being able to adapt the optic instead of committing the Maverick to one narrow range makes the weapon considerably more comfortable as a general-purpose primary.
Meanwhile, the Quickstep Foregrip and Specter-X Guard Stock help balance the heavier ranged components. The aim here isn't simply to chase maximum recoil control at the expense of everything else. A useful Warzone rifle still has to respond when you're strafing behind cover, reacquiring a target, or moving from one firing angle to another. These attachments give the setup a more settled firing platform while preserving enough responsiveness that it doesn't feel completely anchored to the ground.
Taken together, the five attachments create a Maverick that rewards measured bursts and accurate tracking rather than frantic close-range spraying. You get a weapon capable of handling sustained mid-range pressure while still having enough reach to challenge enemies who think they're safe behind distant cover. The compromise is obvious: this isn't the version I'd choose for charging through stairwells or sprinting from room to room.
Gameplay Tips
One situation where I'd want this build immediately is a rotation across an exposed section of the map. If another squad is moving parallel to me, I don't necessarily need to force a down straight away. I'd rather use the Maverick to tag the lead player, make the squad burn plates, and force them toward worse cover. Controlled pressure can be more valuable than emptying a magazine at a target you're unlikely to finish.
The Dual Zoom also changes how I'd handle rooftops. When an opponent keeps shoulder-peeking an air-conditioning unit or parapet, I'd settle into the appropriate magnification and pre-aim the spot where their upper body keeps appearing. Chasing every tiny movement with aggressive corrections usually makes the gun feel worse than it is. Let them walk back into the sight picture. If they disappear completely, I'd reposition rather than sitting in exactly the same window waiting for the return peek.
Things get less comfortable when somebody closes the gap unexpectedly. If an SMG player bursts through a doorway while I'm holding the Maverick, I'm not interested in proving the rifle can win every fight. That's why I'd run a close-range secondary and switch early. Trying to salvage a bad five-metre engagement with a build designed around stability and ranged visibility is exactly how a strong position turns into a trip to the Gulag.
In squad fights, I like the idea of using the Maverick as the weapon that creates the opening rather than always being the gun that finishes the fight. Crack somebody crossing between pieces of cover, keep their teammate pinned for another second, then move while the squad is occupied plating. On Resurgence maps, that often means taking one angle, applying pressure, and shifting before opponents can collapse on the position. Battle Royale gives you more freedom to hold longer sightlines, especially during late rotations when exposed enemies have fewer places to disappear.
I'd also resist the temptation to chase every cracked opponent. If somebody escapes behind a building 40 metres away, charging directly after them can throw away everything this setup does well. I'd rather cut the angle, watch the likely exit, or let a teammate with a faster weapon handle the immediate push. The Maverick feels far more dangerous when you're making the other player cross your sights instead of constantly running into theirs.
Conclusion
This X9 Maverick Warzone loadout turns the weapon into a dependable choice for players who value visibility, controlled recoil, and flexibility across changing engagement distances. The EAM Dual Zoom and OS-Density Barrel give it the tools to handle open-map fights, while the Monolithic Suppressor, Quickstep Foregrip, and Specter-X Guard Stock keep the setup composed without abandoning useful handling.
It won't replace an SMG when a squad crashes through your doorway, and it shouldn't try to. Give the Maverick a strong firing lane, keep a faster secondary ready, and this build can make enemy rotations feel extremely uncomfortable long before they get close enough to fight back on their terms.
PERKS & EQUIPMENT
- Drill Instructor
- Sprinter
- Tempered
Equipment
- LethalCombat Axe
- TacticalStim Shot