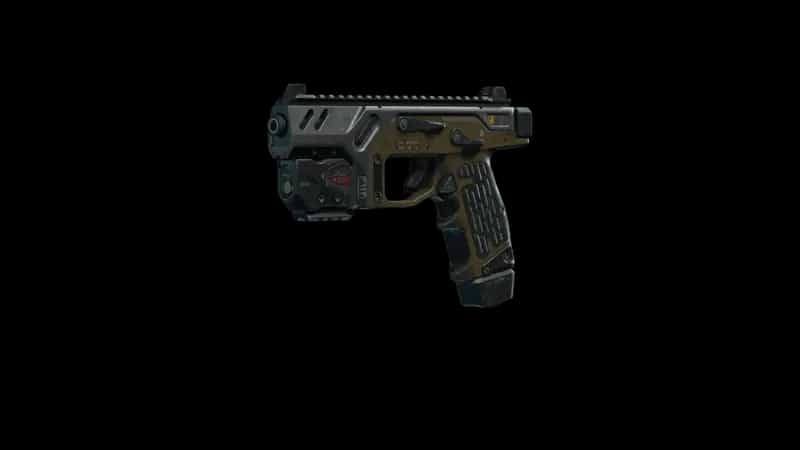
CODA 9 - New Loadout Klaw
MODS
GUIDE
Best CODA 9 Loadout in Warzone: Fast, Suppressed Close-Range Build
The CODA 9 is the kind of Warzone weapon that makes the most sense when you stop asking it to do everything. It is built for aggressive engagements, rapid room-to-room movement, and fights where getting your sights onto an opponent quickly matters more than squeezing perfect accuracy out of every bullet at distance. With the right configuration, it becomes a compact close-range option that fits naturally alongside a longer-range assault rifle, LMG, or sniper.
This setup leans hard into that identity. The 6.3" Greaves Halberd Barrel, Monolithic Suppressor, MFS DeltaCell Bulk Mag, Pincer Grip, and 1mW Pulse Laser create a CODA 9 that feels designed around constant pressure without turning it into an uncontrollable hip-fire gimmick. There is enough ammunition for messy squad engagements, the suppressor keeps your presence less obvious, and the handling-focused parts help the weapon stay responsive when a fight develops faster than expected.
Best Loadout
Rather than stretching the CODA 9 into a medium-range weapon, this configuration concentrates on the situations where a compact automatic gun can have the biggest influence: buildings, staircases, rooftops, tight rotations, and aggressive pushes after an enemy has already taken damage.
| Attachment Slot | Selected Attachment |
|---|---|
| Barrel | 6.3" Greaves Halberd Barrel |
| Muzzle | Monolithic Suppressor |
| Magazine | MFS DeltaCell Bulk Mag |
| Rear Grip | Pincer Grip |
| Laser | 1mW Pulse Laser |
Attachment Analysis
The defining part of this build is the balance between close-range handling and sustained fighting capacity. A short barrel such as the 6.3" Greaves Halberd Barrel keeps the CODA 9 focused on mobility rather than trying to force it into the role of a conventional assault rifle. That matters in Warzone because aggressive secondary weapons often spend more time coming out of a sprint, snapping between targets, and clearing corners than they do holding a perfectly stationary sight picture.
The Monolithic Suppressor complements that approach particularly well. Staying suppressed is valuable when you are working around a building occupied by more than one enemy or trying to clean up a fight without immediately advertising your exact position to another squad. It also gives the setup a more composed feel when engagements stretch slightly beyond point-blank range, which is useful because not every close-range encounter happens inside a tiny room.
Then there is the MFS DeltaCell Bulk Mag, arguably one of the most important choices for the way this configuration is meant to be played. Warzone rarely gives you the luxury of fighting one opponent, reloading safely, and then dealing with the next. A larger magazine gives you more freedom to transition between enemies, continue firing through evasive movement, or finish a downed opponent without immediately putting yourself into a reload animation. The trade-off of carrying a bulkier magazine is easier to accept on a build whose remaining attachments are already emphasizing responsive handling.
The Pincer Grip and 1mW Pulse Laser round out that philosophy rather than pulling the weapon in another direction. Their role is to support quick reactions and make the CODA 9 easier to manage during the frantic first moments of a gunfight. Put everything together and the result is not a precision-focused all-range weapon. It is a deliberately specialized tool for players who want to move quickly, enter fights decisively, and still have enough ammunition to survive when the initial one-versus-one suddenly becomes a full squad engagement.
Gameplay Tips
A CODA 9 build like this changes how I would enter buildings. I wouldn't walk through every doorway already committed to a full sprint. When I know someone is on the other side of a wall or one floor above me, I'd slow down just enough to have the gun ready, then use the weapon's handling once the actual target appears. Speed is useful, but arriving half a second earlier means nothing if the opponent is already aiming at the door.
The bigger magazine also changes which cracked enemies I would chase. If I damage someone who disappears behind a corner and I know his teammates are close, I'm much more comfortable maintaining pressure because I don't have to assume that the first elimination will leave me nearly empty. Still, I wouldn't mindlessly follow a player through three rooms. A CODA 9 is dangerous when you control the spacing; it becomes far less comfortable when somebody drags you into a long hallway or out onto open ground.
Against players strafing aggressively at short distance, I'd concentrate more on keeping my movement clean than trying to make microscopic aim corrections. This is the kind of weapon where a quick lateral reposition around a doorway, crate, or staircase can matter as much as raw accuracy. If an enemy breaks line of sight, I prefer taking a new angle rather than repeatedly peeking the same corner and giving them an easy pre-aim.
Resurgence suits this configuration especially well because fights collapse into chaos so quickly. Imagine holding the upper floor of a building while two players push the stairs and another lands on the roof. That is exactly when the DeltaCell Bulk Mag earns its place. I can deal with the first threat, turn toward the second, and still have options instead of immediately searching for somewhere to reload. The suppressed firing also helps when several squads are close enough to punish every unnecessary piece of information.
Battle Royale requires a little more restraint. During a late rotation across exposed terrain, I wouldn't keep the CODA 9 in my hands simply because it is the more mobile weapon. If opponents are watching from a ridge, rooftop, or distant window, that is the moment to switch to the longer-range primary and save the CODA 9 for the final approach. Once the rotation ends inside a building or behind dense cover, it can come straight back out.
One habit I'd avoid is reloading automatically after every elimination. With a large magazine, there are plenty of situations where ten or fifteen remaining rounds are more valuable than being caught halfway through a reload. If I hear another set of footsteps immediately after a kill, I'd rather reposition with ammunition still available and reload once a wall, closed door, or elevation change has bought me a few safe seconds.
Conclusion
This CODA 9 loadout succeeds because it gives the weapon a clear purpose. The 6.3" Greaves Halberd Barrel, Monolithic Suppressor, MFS DeltaCell Bulk Mag, Pincer Grip, and 1mW Pulse Laser combine into an aggressive close-range package with the ammunition and handling needed for Warzone's unpredictable multi-enemy fights.
It is not the build I would choose for repeatedly challenging distant rooftops or trying to beam players across open terrain. Pair it with something capable at medium and long range, though, and the CODA 9 becomes far more convincing. For players who like breaking into occupied buildings, collapsing on damaged squads, and keeping momentum through consecutive engagements, this configuration gives the weapon exactly the tools it needs.
PERKS & EQUIPMENT
- Mountaineer
- Sprinter
- Adaptive
Equipment
- LethalSemtex
- TacticalStim Shot