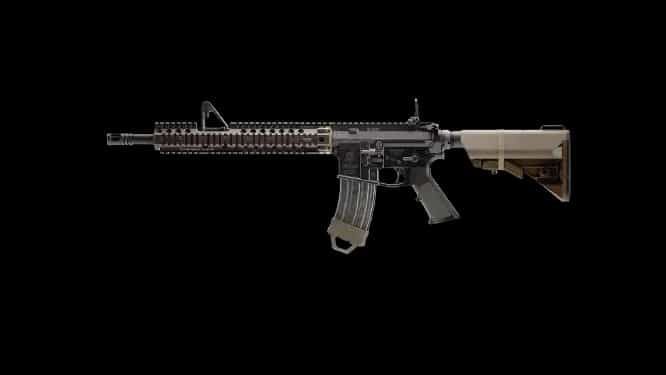
M4 - Loadout MW4 Beta (for M&K players)
MODS
GUIDE
Best M4 Loadout for Modern Warfare 4 Multiplayer
The M4 has always earned its place through reliability rather than gimmicks, and that philosophy remains effective in Modern Warfare 4 (2026) Multiplayer. It may not deliver the most spectacular damage numbers in the assault rifle category, but its predictable handling, competitive fire rate and flexibility make it exceptionally useful across varied maps. This particular setup sharpens the rifle’s accuracy and stability, creating a dependable primary weapon for players who prefer controlled aggression over reckless rushing.
Built around the Corvus LVL-40 and FSS Fireline Grip, this M4 performs best when you can dictate the pace of an engagement. It is comfortable while defending lanes, moving between pieces of cover or supporting teammates from a few metres behind the initial push. The Demo HVR2 Stock reinforces that composed style, while the IOTA-D provides a clean sight picture for tracking targets through the visual clutter of Multiplayer. Frangible ammunition adds an extra layer of pressure by making wounded opponents less comfortable during and immediately after a gunfight.
Best Loadout
This configuration prioritises repeatable accuracy and practical versatility. It is not designed to turn the M4 into a point-blank SMG or an immobile long-range rifle; instead, it focuses on winning the short-to-medium-range engagements that decide most Multiplayer matches.
| Attachment Slot | Selected Attachment |
|---|---|
| Fire Mods | 5.56 NATO Frangible |
| Muzzle | Corvus LVL-40 |
| Underbarrel | FSS Fireline Grip |
| Optic | IOTA-D |
| Stock | Demo HVR2 Stock |
Attachment Analysis
The Corvus LVL-40 and FSS Fireline Grip form the mechanical core of the build. Together, they make the M4 easier to hold on target during sustained bursts, reducing the amount of manual correction needed once the rifle begins climbing. That matters when an opponent appears at the far end of a street or behind partial cover, where landing the opening shot is not enough—you also need the next several rounds to remain grouped. The resulting recoil pattern feels more manageable without forcing the weapon into an excessively slow, defensive role.
The Demo HVR2 Stock complements that recoil-focused pairing by improving the rifle’s sense of stability when aiming and firing. With less unwanted movement disturbing the sight picture, the IOTA-D becomes more than a cosmetic preference. Its uncluttered view helps with precise upper-torso tracking, particularly against players strafing around head glitches, doorways and narrow pieces of cover. The optic also makes it easier to recognise whether a target is fully exposed or whether only a shoulder and head are available before committing to a longer burst.
There is a deliberate trade-off here. Using several attachments to settle the weapon means this M4 is better when raised in anticipation than when reacting to an enemy already sliding into the room. Its handling should remain usable for an assault rifle, but the build rewards preparation more than improvisation. The 5.56 NATO Frangible rounds fit that identity nicely: after connecting with an opponent, the ammunition can interfere with their ability to recover cleanly, giving you more time to maintain pressure, reposition or challenge before they fully reset.
Frangible ammunition does not replace raw damage or perfect shot placement, so it should not be treated as a shortcut to faster kills. Its value emerges across repeated engagements. An injured enemy attempting to escape behind cover becomes easier to contain, while aggressive opponents may find it harder to shake off damage before reappearing. Combined with the M4’s stable automatic fire, the complete setup offers a useful balance of accuracy, target tracking and sustained pressure across the most common Multiplayer distances.
Gameplay Tips
What I like about this build is how confidently it can watch the space between two objectives. On a Domination map, I would avoid sitting directly on the flag unless the situation demands it. Holding a nearby angle usually gives the M4 room to work: pre-aim the route enemies use to enter, fire a controlled burst and move before the return grenade or pre-fire arrives. The rifle is accurate enough to punish repeat challenges, but staying in the same window after two kills is asking to be traded.
Against a player crossing an open lane, I would keep firing only while the reticle remains centred on the upper body. If the recoil begins carrying shots above the target, briefly release the trigger and reset instead of dragging through an entire magazine. The Corvus and Fireline combination gives you excellent control, but disciplined bursts still conserve ammunition and reduce the chance that a second opponent catches you during a reload.
Buildings require a different approach. I wouldn’t sprint blindly through a doorway with this setup, especially if footsteps suggest an SMG user is waiting inside. Approach with the weapon ready, slice the angle and make the opponent enter your sightline. If you are surprised at arm’s length, commit to the fight rather than trying to manufacture distance halfway through it. However, when cover is available, breaking line of sight and re-challenging from another entrance plays far more naturally to the M4’s strengths.
The Frangible rounds become especially annoying for opponents during coordinated pressure. When a teammate damages someone retreating around a corner, a few accurate M4 hits can prevent that player from enjoying a comfortable reset. I would not automatically chase every cracked or wounded enemy, though. Watch for the second player holding the doorway; maintaining the angle often produces a cleaner kill than following the first target into a prepared crossfire.
One small habit makes a big difference with this configuration: bring the IOTA-D onto likely angles before your character clears them. The build feels far better when the first bullet leaves an already settled rifle. That fraction of a second is often the difference between controlling the encounter and being forced into a messy hip-fire duel.
Conclusion
This M4 loadout gives Modern Warfare 4 Multiplayer players a stable, readable and tactically flexible assault rifle. The Corvus LVL-40, FSS Fireline Grip and Demo HVR2 Stock keep automatic fire under control, while the IOTA-D supports accurate tracking and 5.56 NATO Frangible ammunition helps sustain pressure on wounded enemies.
It is a strong choice for objective modes, lane control and methodical pushes where positioning matters as much as reaction speed. Treat it as a rifle that rewards an early read on the fight, and it can become the weapon you trust when the map refuses to play at just one range.
PERKS & EQUIPMENT
- Ninja
- Fast Hands
- Scavenger
Equipment
- LethalSemtex
- TacticalSmoke Grenade